How to Make Spotify Playlist Private on Desktop/Mobile
Making a private playlist on Spotify is a useful feature if you want to keep your music tastes to yourself or create a personal playlist for a special occasion. By making a playlist private, you can prevent other users from seeing, following, or sharing it. You can also set your profile to hide new playlists by default.
On Desktop (PC/Mac):
- Step 1. Open the Spotify app on your Win/Mac.
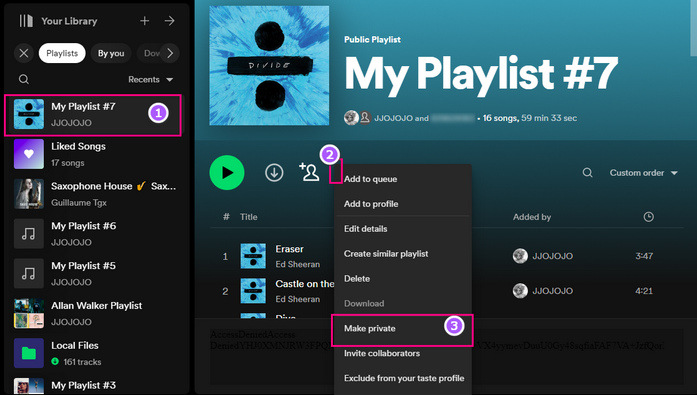
- Step 2. Locate the playlist you want to make private in your library or playlists section.
- Step 3. On the playlist page, right of the invite collaborators button, click the three dots.
- Step 4. From the three-dots menu, select Make Private.
- Step 5. The playlist will now be private and visible only to you.
Tips: You cannot set Spotify playlist private on Spotify Web Player (Browser).
On Mobile (Android/iPhone/iPad):
- Step 1. Open the Spotify app on Android, iPhone, or iPad.
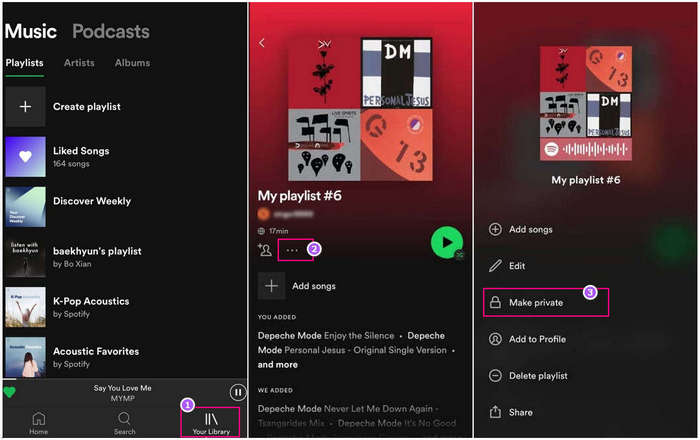
- Step 2. In the bottom bar, tap Your Library.
- Step 3. Select the playlist to hide.
- Step 4. At the top of the playlist page, tap the three dots.
- Step 5. From the menu that opens, select Make Private.
Tips: If you want to make the playlist public again, please repeat steps 1-3 above and choose Make Public.
 How to Make a Private Playlist Collaborative?
If you want to make your Spotify playlist private and collaborative, you can use the “Collaborative Playlist” feature. This feature allows you to invite others, such as your friends, to contribute to your playlist while yet keeping it private.
Here’s how you can share a private playlist with friends using the Collaborative Playlist feature:
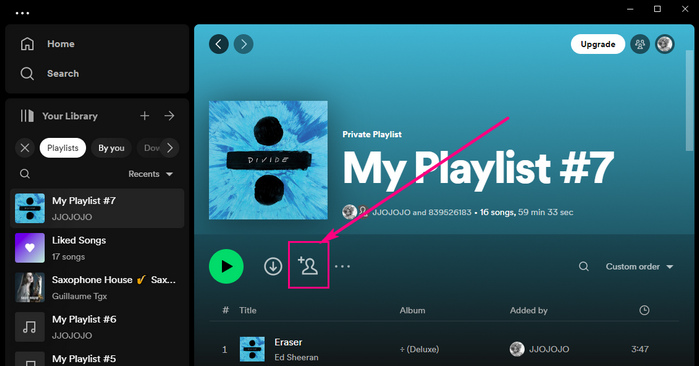
- Step 1. Make sure the playlist you want to share is set to private.
- Step 2. Right-click on the playlist and select “Collaborative Playlist” from the options (on desktop) or tap the three dots (…) and select “Collaborative Playlist” (on mobile).
- Step 3. Spotify will generate a unique link for the playlist.
E.g. The share link is:
Spotify - Step 4. When your friends receive the link, they can open it and join the joint playlist.
- Step 5. Once they have joined, they will be able to add, remove, and reorder songs within the playlist.
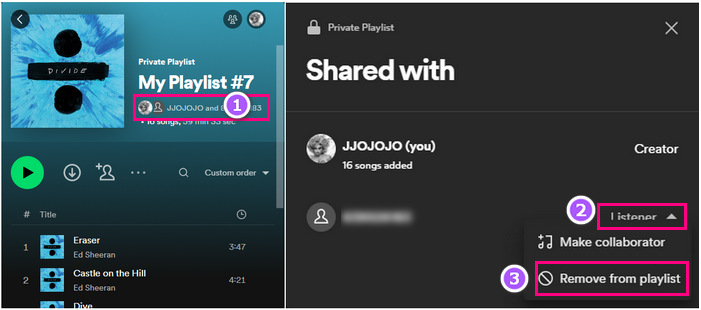
How to Remove Someone from a Private and Collaborative Playlist?
If you want to remove someone from your private playlist, simply access the private playlist, click on the profile icon next to the playlist name, and select “Listener > Remove from Playlist”.
How to Download Private Playlists on Spotify to MP3 for Spotify Free
Learning to make Spotify private playlists accessible on any device opens up a world of possibilities. You might want to take it a step further and download these private playlists in MP3 format for offline enjoyment, device transfer, and better control over your music collection.
AudiFab is the best Spotify music converter you can find. With AudiFab, you can effortlessly download Spotify private playlists in original quality to MP3, AAC, ALAC, WAV, FLAC, and AIFF formats and play them on any device without ads. AudiFab has several advantages such as 10x fast speed, ID3 tags editing, CD burning, etc.
Next, let’s see how to utilize AudiFab Spotify Music Converter to download private playlists on Spotify to MP3 format.
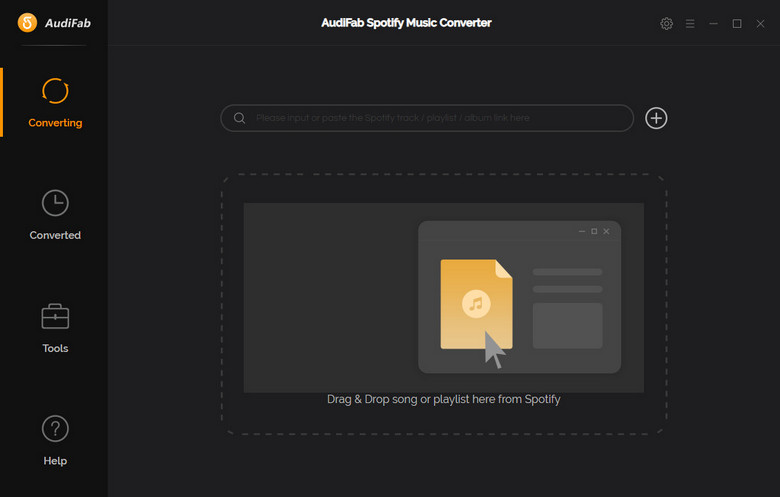
STEP 1 ** Install AudiFab Spotify Music Converter and run it**
Download and install AudiFab Spotify Music Converter on your computer. Once installed, launch the program and explore the world of offline music enjoyment.
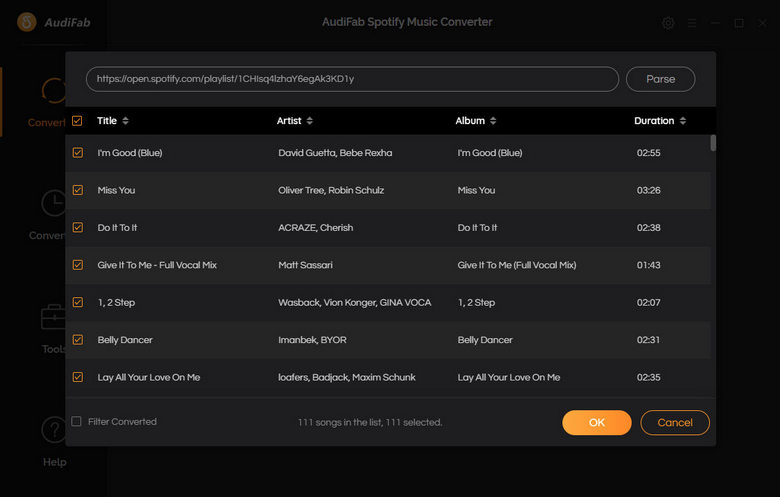
STEP 2 ** Add Spotify Private Playlists to AudiFab**
Navigate to any playlist (not just private playlists) that you want to download on Spotify. Copy the private playlist’s URL. Return to AudiFab, paste the playlist URL into the search box, then click “+” to analyze and load the playlist.
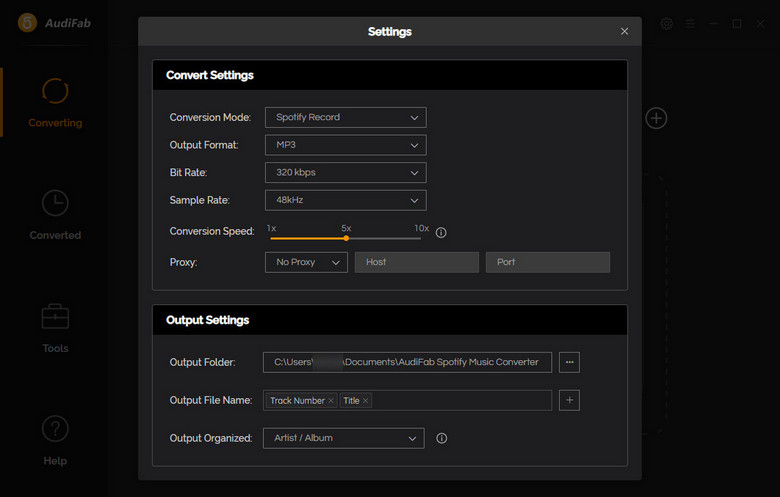
STEP 3** Choose MP3 as the output format for private playlists**
Click the settings button in the upper right corner of AudiFab and pick MP3 as the output format. Feel free to adjust the output quality, output path, output file name, and other parameters.
STEP 4 ** Begin converting Spotify Private Playlists to MP3s**
Click “Convert” to start converting the private playlist to MP3. AudiFab Spotify Music Converter will convert the selected private playlist to the chosen format.
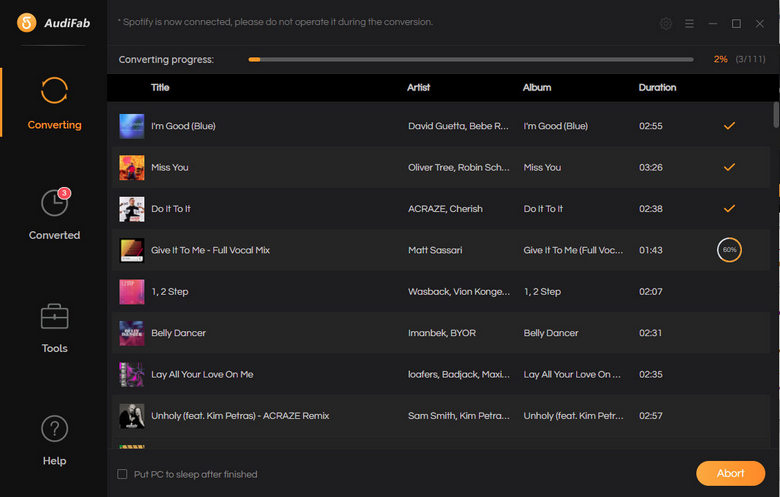
STEP 5** Access the Private Playlists You’ve Downloaded**
The moment has arrived! As the conversion process comes to a close, you can find the downloaded private playlists in the output folder you specified. The converted tracks are now ready to be transferred to any device for offline listening.

 YouTube Video: How to Download Spotify Music to MP3
Extra Tips: Alternative Ways for Private Playlists and Enhanced Privacy
Hide Your Spotify Playlists From the Public
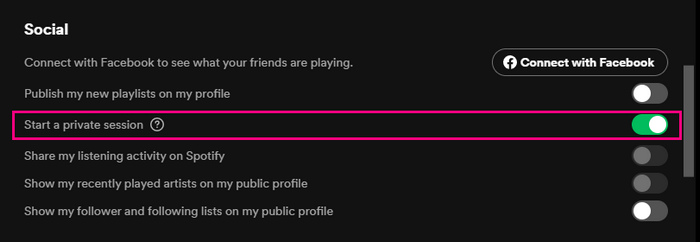
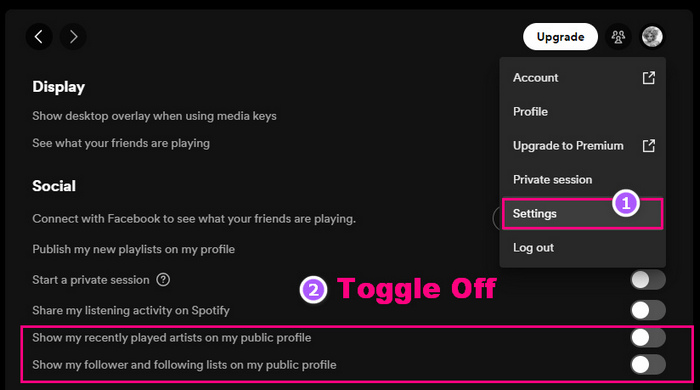
You can conceal your public playlists from your profile if you don’t want others to view them. To do so, go to Settings > Social > toggle off Show my current top artists and Show my recently played artists. This will hide your musical interests from other users on your profile page.
Set Up a Private Listening Session on Spotify
Another way to enjoy Spotify without revealing your activity to your followers is to set up a private listening session. This will temporarily hide your listening behavior from your friends and the public. To do so, navigate to Settings > Social > Private Session and toggle it on. You can also access this option from the menu bar by clicking on your profile name and selecting Private Session. Note that this feature will automatically turn off after six hours of inactivity or when you restart the app.